Connecting a site to Formitor takes three things: install the plugin, copy two credentials, paste them into the dashboard. This walkthrough covers the whole flow with screenshots. Once you know the flow it takes about a minute per site.
Prefer to watch? The whole flow in one minute:
Before you start
You need a Formitor account and admin access to the WordPress site you want to monitor. That’s it. The plugin works with Fluent Forms, Gravity Forms, WPForms, Ninja Forms, Formidable, Forminator, SureForms, Elementor forms and WooCommerce checkout out of the box.
Step 1: Download the plugin
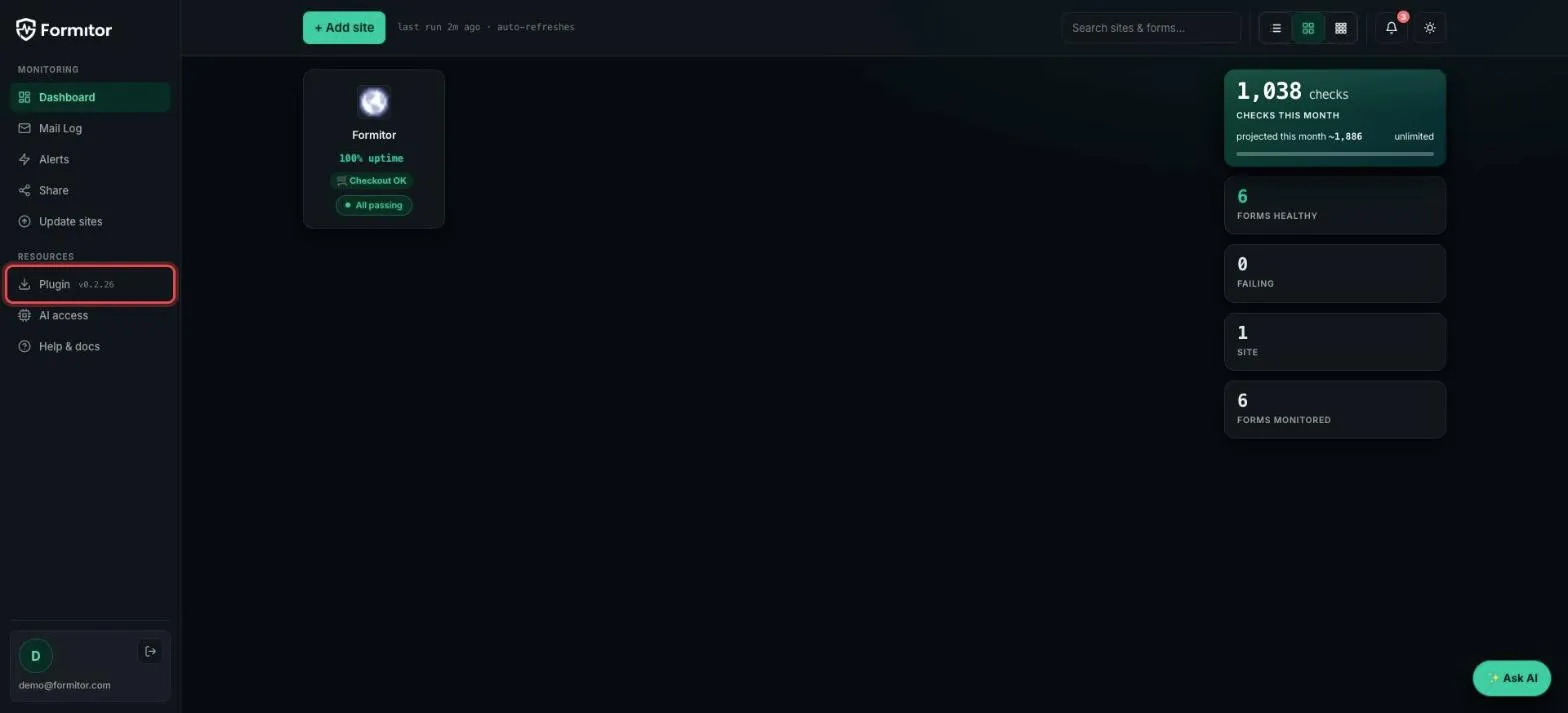
In your Formitor dashboard, look at the left sidebar under Resources and click Plugin. Your browser downloads formitor-spoke.zip.
Step 2: Install it on the WordPress site
In the site’s wp-admin, go to Plugins → Add Plugin and click Upload Plugin.
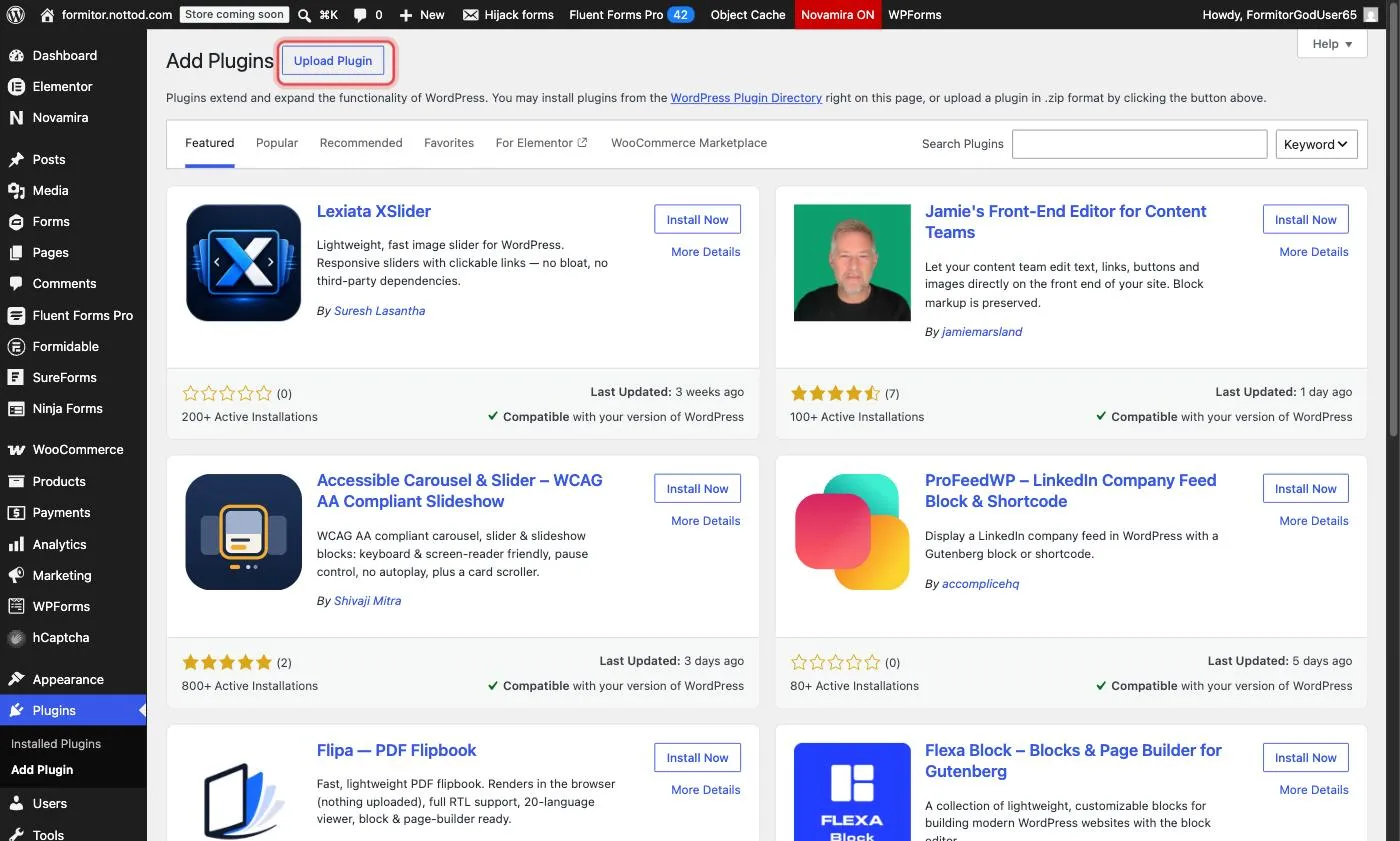
Choose the formitor-spoke.zip you just downloaded, click Install Now, then Activate. The plugin generates its pairing credentials automatically on activation. No account sign-in happens inside WordPress; the plugin only answers signed requests from your hub.
Step 3: Copy the pairing credentials
Go to Tools → Formitor (or the top-level Formitor menu item, depending on the menu setting). The Pairing credentials panel shows four values. You need two of them: the Site key and the Shared secret. Each has a Copy button.
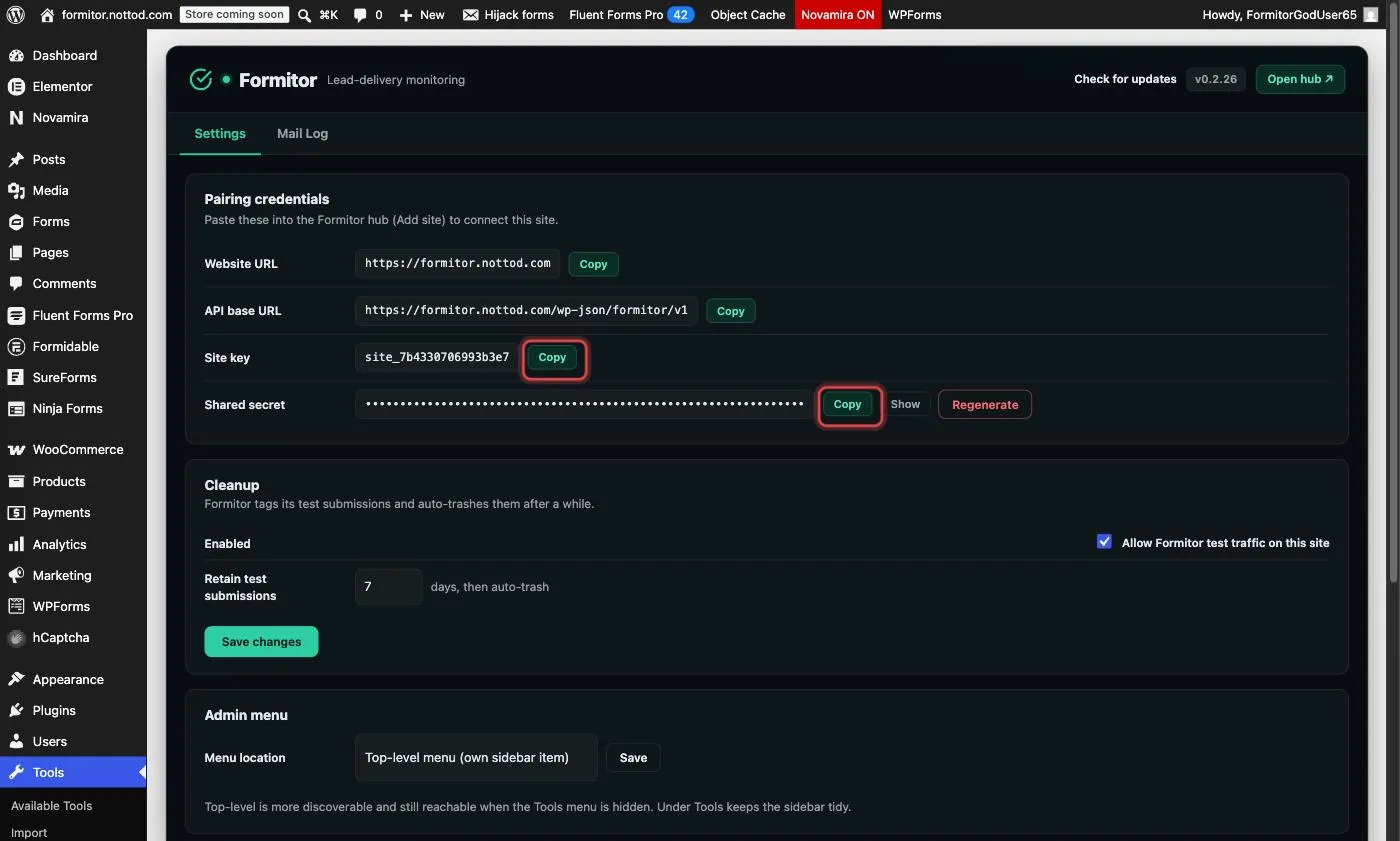
The secret stays masked on screen. Treat it like a password: anyone holding it can schedule test submissions against the site. If it ever leaks, click Regenerate and re-pair.
Step 4: Add the site in your dashboard
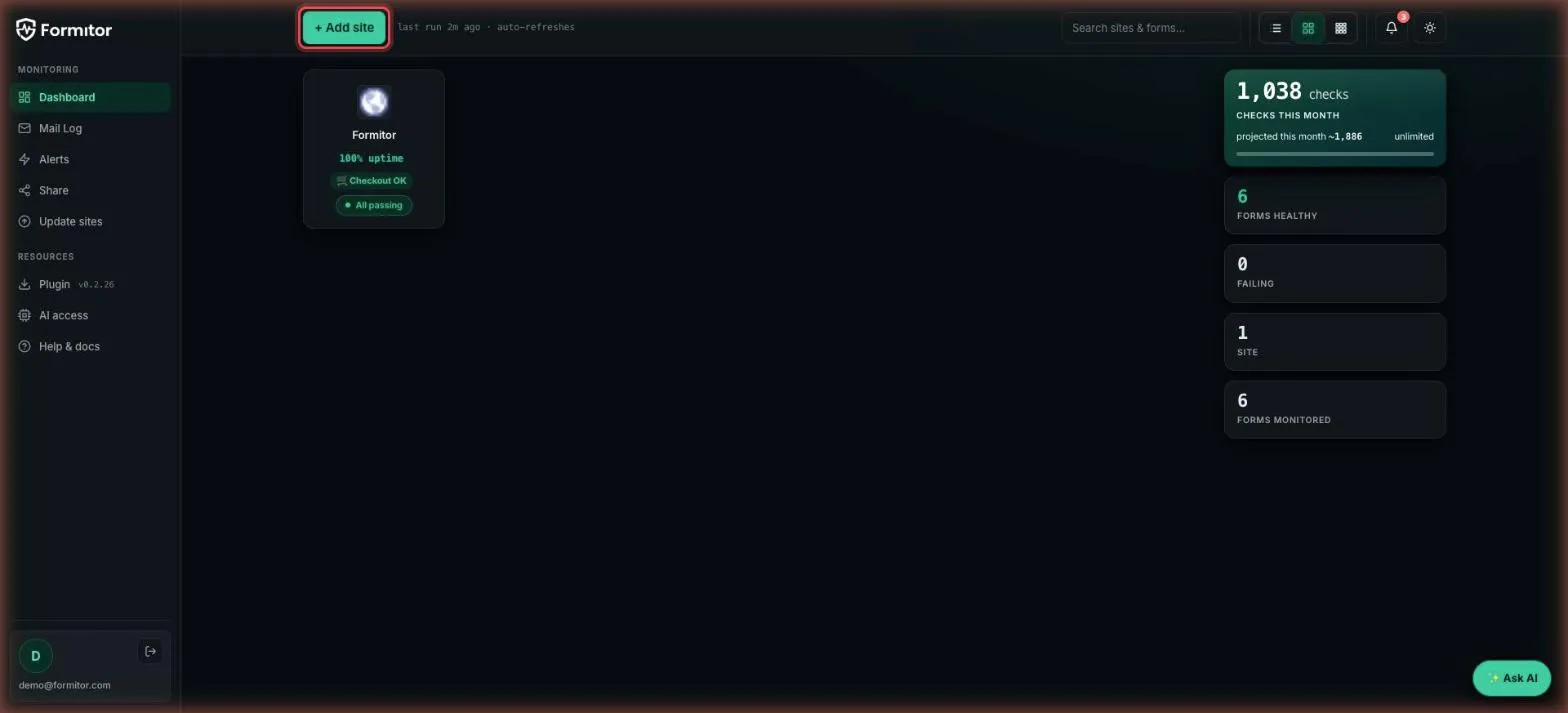
Back in the Formitor dashboard, click + Add site at the top.
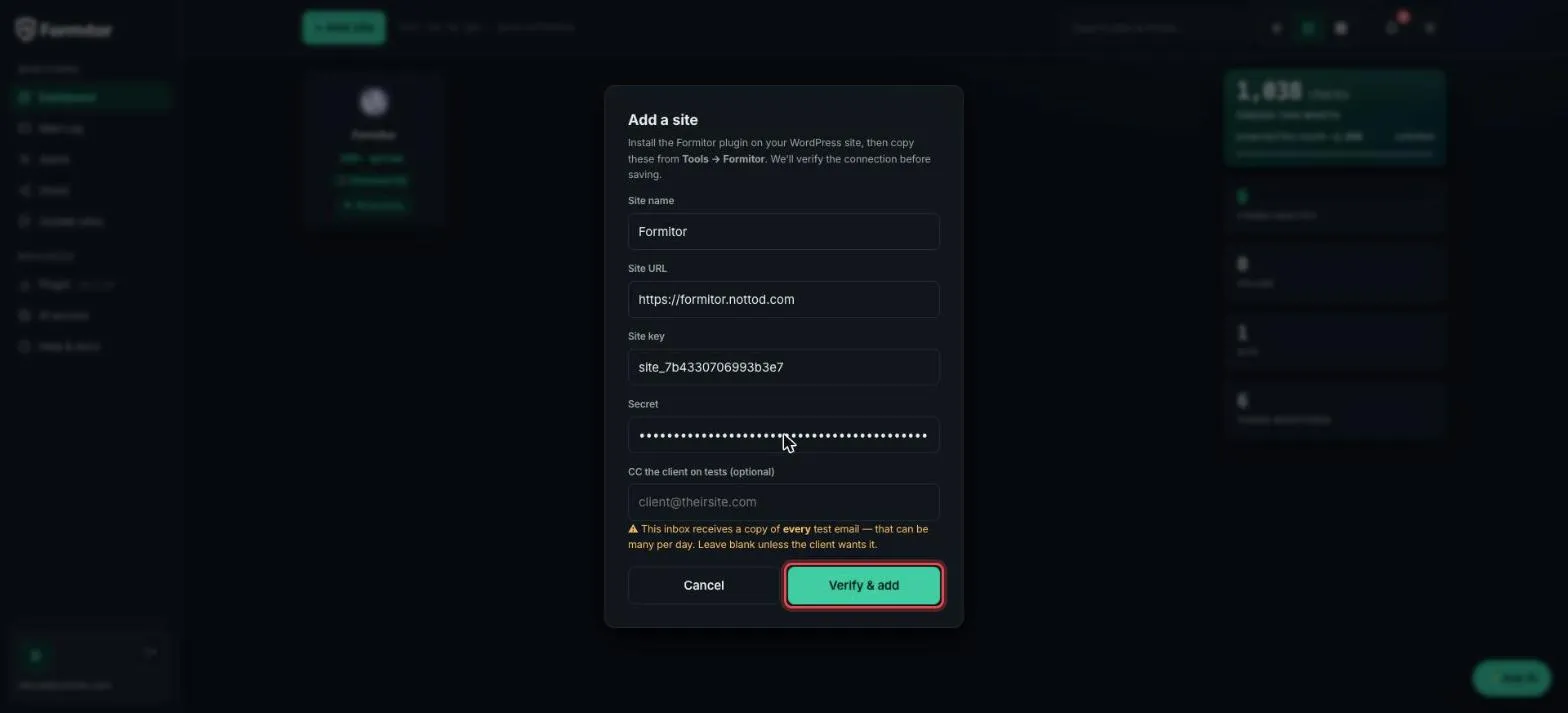
Fill in the four fields: a display name, the site’s URL, and the site key and secret you copied in step 3.
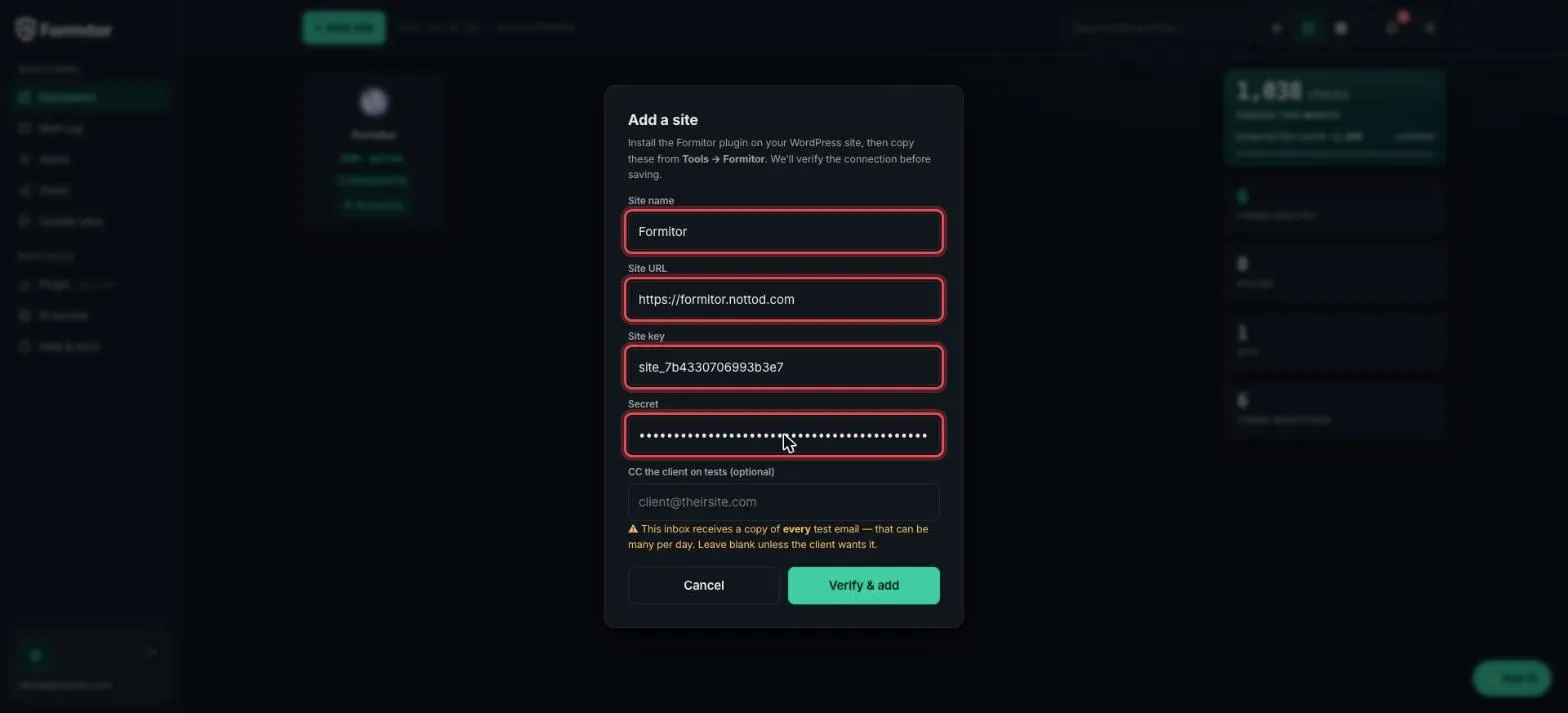
Click Verify & add. Formitor immediately makes a signed request to the plugin to prove the URL, key and secret all match before saving anything. If the site redirects or the credentials are wrong, you get a specific error instead of a silently broken connection.
Step 5: Done
The site appears on your dashboard and the first check is queued right away. Forms are discovered automatically; within a few minutes you’ll see them listed under the site with their monitoring status.
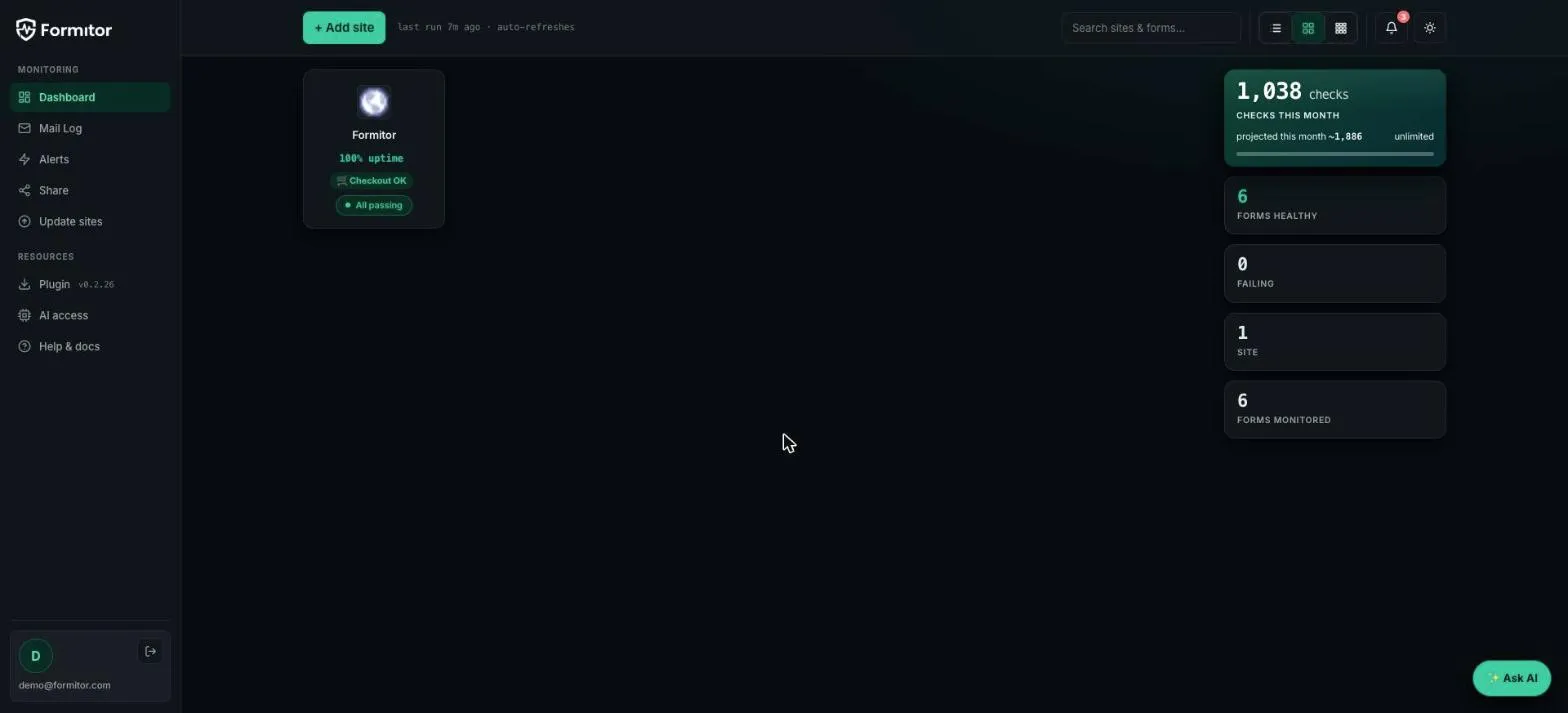
From here Formitor submits scheduled test entries to every discovered form, verifies the notification email actually gets delivered, and alerts you the moment either step fails.
Troubleshooting
“Could not reach the site.” The site is offline, the plugin is deactivated, or a firewall is blocking the request. If you run Cloudflare with a challenge on everything, add an exception for /wp-json/formitor/*.
“Could not verify the site.” URL, key or secret doesn’t match. Re-copy both values from Tools → Formitor; if you regenerated the secret at some point, the old one is dead.
“This site is already registered to another account.” Each site pairs with exactly one Formitor account. Remove it from the other account first, or regenerate the secret to cut the old pairing.